primedocs Web
Use primedocs Web to create documents in a browser on a PC, tablet or mobile phone. Your organisation provides the web address. Available templates, profiles and outputs depend on permissions and configuration.
Navigation and home page
Use the main navigation to switch between Start and Templates. The home page shows favourites, recently used templates and News with new and changed templates from the last few days. On narrow screens, the navigation adapts to the available space.
User menu and panels
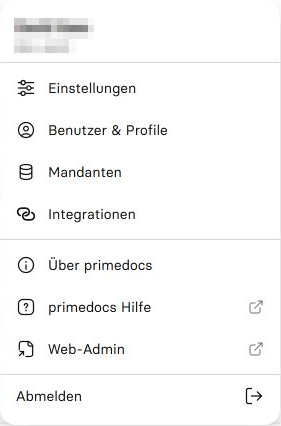
Click your name or user picture, at the top right on desktop screens or above the navigation on narrow screens. The menu opens Settings, User & Profiles, Integrations and About primedocs. Tenants appears when multiple tenants are available. A configured help link also appears here, for example as primedocs Help. Use Log out to end your session. Additional entries may appear depending on permissions.
Settings and management views open over the current page. They appear as a centred dialog on desktop screens and as a panel from the bottom edge on narrow screens. Use Close to return to the page.
Profiles
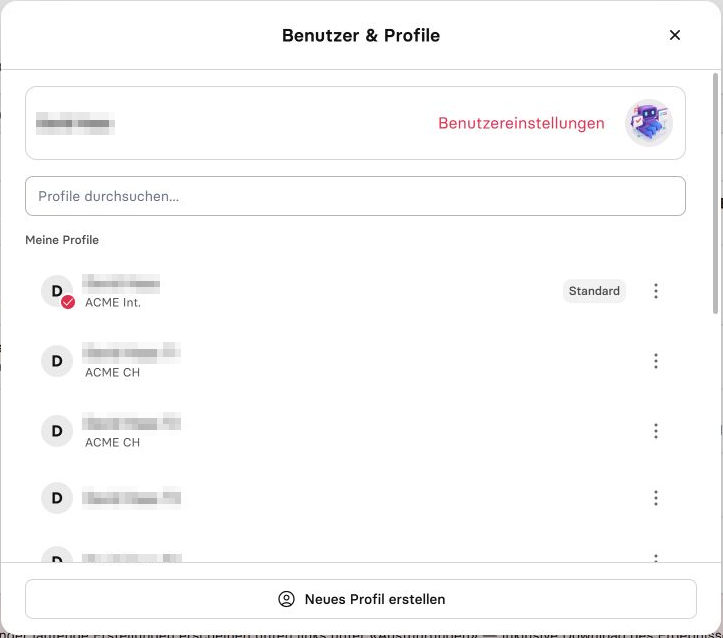
Open User & Profiles to search profiles or open one of your own profiles for editing. Its options also let you set it as the default profile or delete it. Select the profile for a document in the template form. Use Create new profile to add another profile. User settings opens the user's data; editing an individual profile is a separate action.
Shared profiles appear in a separate area with an indication of their owner. In this release, primedocs Web opens shared profiles read-only. Editing with write access is available in primedocs Desktop or Web Admin. Whether a shared profile can be used for documents depends on its sharing permissions.
Profile fields and inheritance
A profile takes its fields from your user data and from the assigned organisation unit. An inherited field is marked with a chain icon next to the field and follows any change to the source value.
If you enter your own value in a field, it applies to this profile only. Use the Synchronize icon next to the field to discard your own value so that the field takes the value from your user data again.
Fields are maintained per document language — select the language via the dropdown next to User data. Fields you fill in only in the main language also apply to the other languages.
How the profile picture and the signature behave, and how to run a profile deliberately without an image, is described under Images in the profile.
User settings
Under Settings, select the interface language, document language and the Light, Dark or System colour theme, then confirm with Save. The theme selection is retained when the page reloads. Maintain personal data under User & Profiles → User settings.
Check user data on first use. Complete editable fields and save changes.
Finding templates
Open Templates and select a folder. Use the navigation path above the list to return to a parent level.
The toolbar offers List view and Grid view, with Detail view also available from medium screen widths. Search to find templates; inside an open folder, the search initially covers that folder. Under Filter, extend the search to all templates and limit the displayed template types.
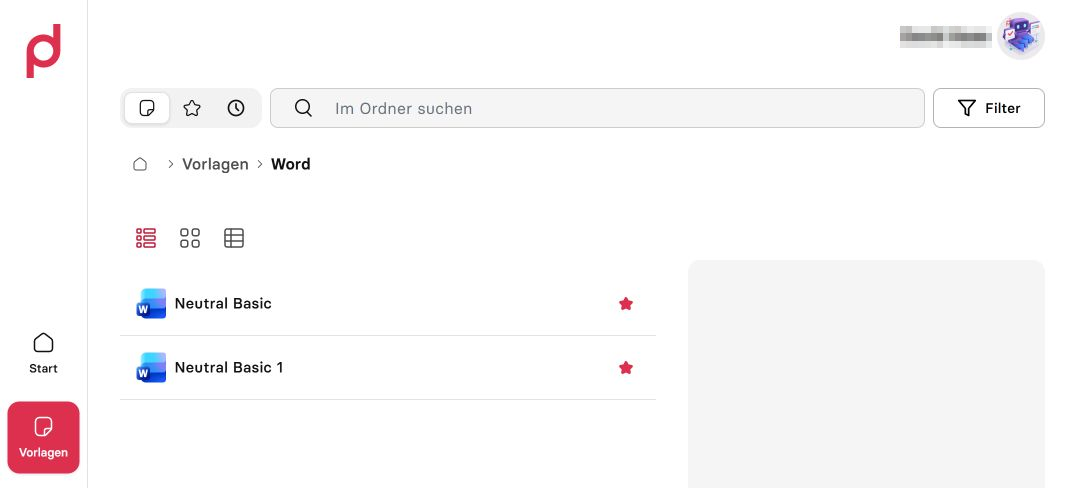
Click a template to open its form. Use the star to add or remove a favourite. The preview shows a stored preview image.
Favourites and recently used templates
In the template overview, use the header controls to switch between Templates, Favorites and Recently used. The Outlook taskpane arranges these entry points differently to save space.
Creating a document
- Open the required template.
- Select the document Profile and Language. The profile determines the user and organisation data.
- Complete the template-specific fields. Required fields are marked with an asterisk.
- Check the document in Live preview, if available.
- Select an available output, such as Create & download.
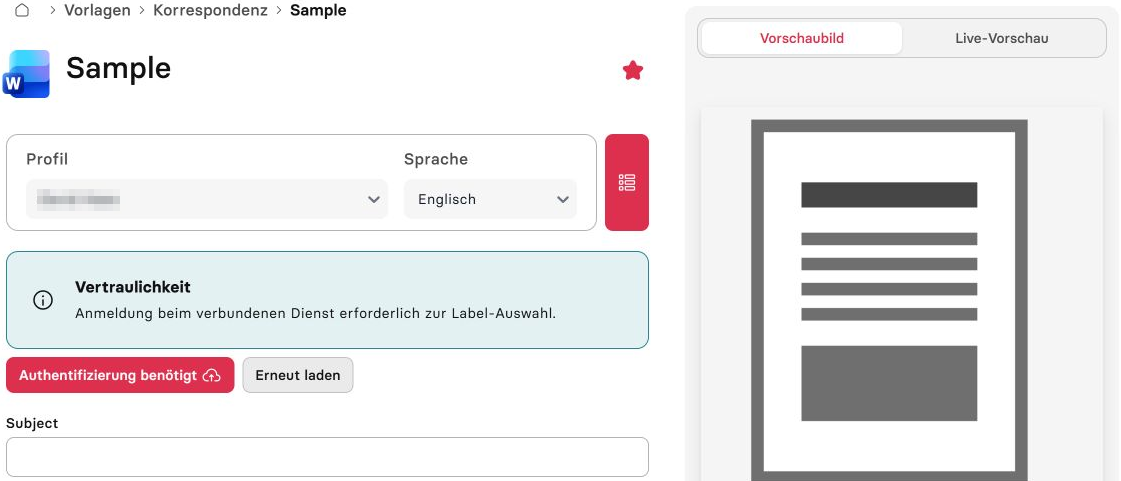
The example shows the template form before generation. The right-hand area currently displays the stored preview image; Live preview is a separate selection. The sensitivity-label notice indicates that this example requires a connected-service sign-in.
Live preview
Supported Word, Excel and PowerPoint templates also offer a Live preview in the preview area beside the form, which starts only when selected. On narrow screens, open the preview panel to access it. This live preview is unavailable in Connect mode.
The stored preview image helps you identify the template. Use the live preview while completing the form to check the document before selecting its output.
Recipients and other objects
Depending on the template, enter a recipient manually or search a connected data source. Open the available action, enter search criteria and add a result to the form. Existing entries can be edited or removed through their actions.
Additional profiles, for example for a co-signature, and further form groups appear only when configured in the template. Expand groups as needed and check missing required values. For multiple groups, use the menu in the form header to switch groups if group navigation is enabled for the template.
Sensitivity label
A sensitivity label classifies a document according to your organisation’s information protection policy. The broader term Security Label is also used for such classifications. primedocs uses sensitivity labels from Microsoft Information Protection (MIP), part of Microsoft Purview.
If the template offers this selection, choose the label appropriate to the document’s content before generating the output. The labels available depend on your organisation’s configuration. A label can specify access protection when configured accordingly. Visual markings such as headers or watermarks may be added when opening the document in Office. Its name alone does not indicate which protection settings are enabled.
If the form requires authentication for label selection, sign in to the connected service and reload the selection. Then check the label before creating the document.
Output
Create & download downloads the result to the device. Saving to OneDrive is available when OneDrive is enabled for the environment. Office, Teams and SharePoint contexts offer host-specific outputs instead. Other output buttons may run template-specific actions.
A downloaded document can be opened in the appropriate Office application. The primedocs ribbon is available there only when primedocs Desktop and its add-ins are installed.
Connect mode
When another system starts primedocs Web through a Connect Session, a banner indicates that Connect mode is active. Document creation then uses the supplied data. Use the banner's close button to leave this mode.
Executions and messages
Track longer document generation tasks under Executions. Check their status and download available results. Errors during actions also appear as visible notifications. Read the message before retrying a failed action.
Connected services
Use Integrations in the user menu to manage connected-service sign-ins. If an action requires authentication, the Login required dialog lists the affected services. Sign in and then select Retry.
Help and version information
Open the configured help link through the user menu, if available. About primedocs shows version information for the current environment.