Create a document
In primedocs, you always create a document in three steps:
- Select a document — find and open the right template.
- Fill in properties — enter the fields in the properties dialog (Forms).
- Finalise the document — edit, save, print, or send.
The process is the same in all applications; only the interface differs slightly. The following steps describe the path in primedocs Desktop; in primedocs Web and the web add-ins the steps are identical, but the arrangement of the elements differs slightly.
Step 1: Select a document
Switch to the Templates tab. On the left, you see your template groups, in the middle the templates of the selected group, and on the right a preview image of the selected template.
You only see the templates you are authorised for. The template groups apply to all users and cannot be created by yourself — the only individual groups are Favourites and Recently used.
You generate a new document
- with a double-click on the template, or
- via the New document button.
If you want to create the document with a particular profile or in a particular language, select these before generating, via the profile or document language selection. See Additional functions.
Step 2: Fill in properties
After opening a template, the properties dialog (also called the Forms dialog) appears — provided it is configured for the template. Here you enter the details that are inserted automatically at the right places in the document, for example recipient, subject, date, or enclosures.
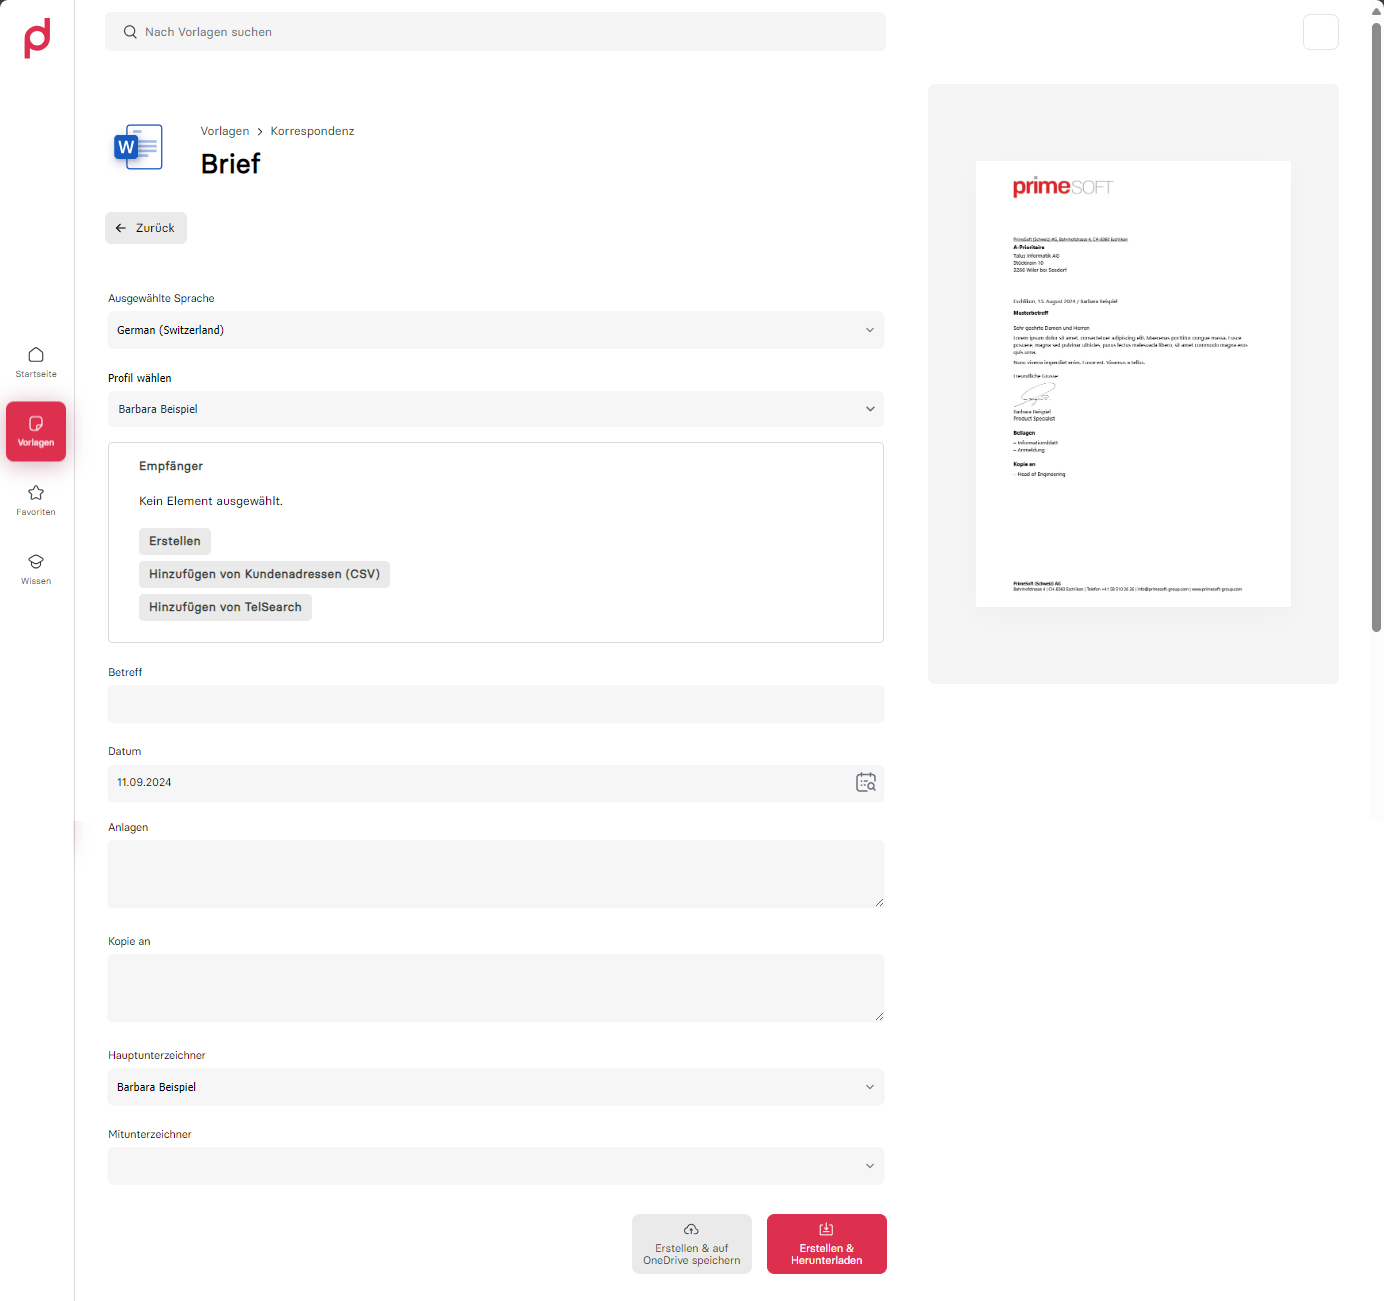
- Fields with an asterisk (
*) are mandatory fields and must be filled in — otherwise the document cannot be created. - Use the Tab key to navigate conveniently from field to field.
Entering or selecting a recipient
If the template requires a recipient (e.g. for a letter), you have two options:
- Create manually — click Create, fill in the fields, and save.
- Select from a data interface — choose a data interface, fill in the search fields, search, and add the desired entry.
Which fields are shown depends heavily on the respective template and your organisation's configuration, and may differ from the examples.
Choosing a sensitivity label
If classification with Microsoft Purview is set up for the template, the Sensitivity field appears in the properties dialog. Choose the appropriate sensitivity label — only the labels you are entitled to are shown. primedocs applies the label to the document automatically during generation; the visual representation (e.g. watermarks) is handled by Microsoft Office based on the label.
Confirm the dialog. The document is generated with the data you entered.
Step 3: Finalise the document
The generated document opens in the respective Office application with the primedocs tab. It is a completely normal Office file (.docx, .xlsx, .pptx) that you can edit, save, print, or send by email as usual.
You should only change automatically filled fields (such as those in the header and footer) via the properties dialog, not directly in the document. This way, your changes are not overwritten the next time the document is opened.
For how to continue editing the document in the respective Office application, see Add-Ins (Desktop) or Add-Ins (Web).
Additional functions
Switching profile
If you want to generate a template with a different profile, first select the desired profile and then generate the template. The generated letter then contains the details of the selected profile in the letterhead (e.g. email, phone, and title).
Switching document language
You can generate documents in different languages. Click Document language, select the desired language, and then generate the document.
Favourites
Build a favourites list from your frequently used templates: select a template and click Add to favourites. The template receives a star icon and appears in the Favourites category.